Analyzing C/C++ projects with Sonargraph is always a bit more difficult due to the huge variety of different compilers and environments. We recently added a new import wizard that should simplify the process.
For a successful analysis of a C/C++ projects Sonargraph must be able to emulate the compiler you are using and also needs to know which source files are part of the project and the compiler options used for each source file, mostly the -I options for include directories and the -D options which influence conditional compilation.
The first part is solved by a so called “compiler definition”. Sonargraph comes with predefined compiler definitions depending on your platform. If your compiler is not among them you can always create a new compiler definition (menu File / New / Configuration). You can also manage your compiler definitions in the Sonargraph preferences. The main job of a compiler definition is to define the location of implicit include directories (for standard headers like stdio.h) and to define all predefined macros of your compiler platform.
The second part is a bit more tricky because there are so many ways to compile C/C++ code, e.g. make, cmake, MS-Build and others. Often different files are compiled with different options. The best way to obtain the correct options is to have something in between your build system and the compiler that logs away the options used for each file. ccspy is designed to play that role. It is a small open source program written in Go (for easy multi-platform compatibility). All you need to do is to replace your compiler with ccspy and then configure ccspy so that it calls your compiler after having recorded the options used for your compiler. That means you can keep ccspy in your build for as long you want to use Sonargraph. If new source files are added or existing ones are removed, ccspy will detect that automatically.
ccspy needs to be configured with a project specific target directory. This is where it stores one file per compilation unit that contains all the information needed by Sonargraph to analyze your code correctly. I recommend to keep that target directory at the root of your project parallel to the Sonargraph system directory and call it ‘ccspy‘. In contrast to the Sonargraph system directory do not add the content of the ccspy target directory to your version control system because it contains system specific paths. So it will be slightly different on each machine. Before you import your project into Sonargraph for the first time you should run a clean build ensuring that everything is compiled from scratch. Also build every time you add new compilation units so that the ccspy target directory is up-to-date.
Once you have successfully built your project with ccspy you are ready to import it into Sonargraph. Just select “New | System | New C/C++ System based on ccspy Directory” from the Sonargraph “File” menu.It will first ask you which compiler definition to use. If there is now definition for your compiler you can create a new one directly from this wizard. After that you will come to this page:
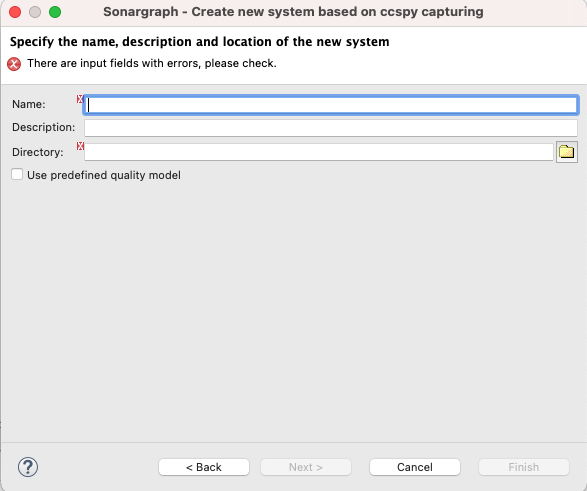
Here you enter the name of your project and select the root directory of your project. If you like you can pick a predefined quality model by checking the box under the directory. The next page will ask you for the ccspy target directory, which should exist and be filled at this point.
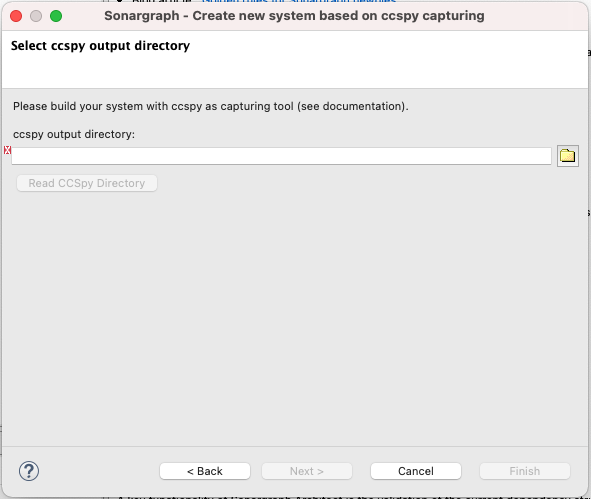
If you followed my recommendations you select the ‘ccspy‘ directory which should be in the root of your project. Once you have selected it please press the “Read CCSpy Directory” button. If everything works fine you can the move on to the next page, where you can select the source root directories for your project:
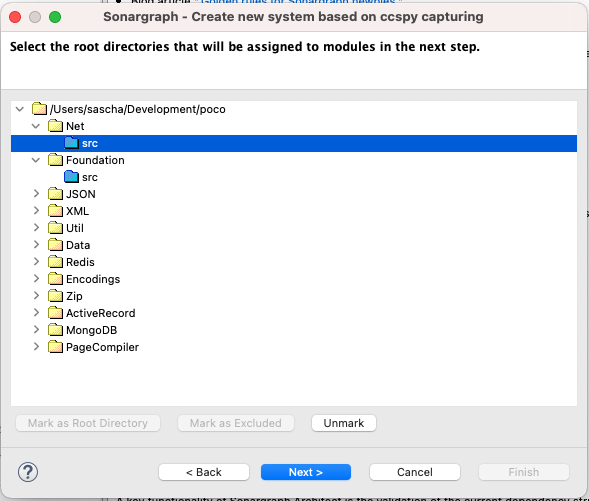
Here i picked just two root directories. After you picked at least one root directory you can move on to the final page:

That page allows you to map root directories to modules. If you don’t like the proposed module names you can change them right on this page. After that please press finish. You can now click on the “Refresh” button in the task bar, which will start your analysis. After the parser has finished I recommend having a look at the parser log window, which can be found under “Windows | Show View | C/C++ Parser Log”. Watch out for missing include files which can sometimes mess up the results. Compiler errors are normally not a big concern, unless you have a huge number of them In that case that might point to a configuration problem, e.g. a missing implicit include directory in your compiler definition.
If you want you can fine tune options and include directories via “System | Configure C/C++ Modules”.